AjaxSync JavaScript Application
As said before, we will start with a small chat application. The usability or looks of the application aren't of interest here, we will concentrate only on the AjaxSync messaging mechanism.
For a chat, we need an editor in which we can write messages; here we are using a simple textarea. Next we need a possibility to display received messages. Here we are using a div tag and simply append new messages to its innerHTML attribute.
In a chat, normally each user is personalized, so we need a login mechanism. Indeed using AjaxSync is not possible without being logged in, because the flow of messages is controlled by permissions granted to its users. A login dialog consists of a username input field, a password field and a login button.
We need also a possibility to display error messages from the AjaxSync system. Here I simply use another div tag and append new error messages to its innerHTML attribute.
The necessary HTML elements can be defined like this:
<div style="color: red;" id="error">
    <!-- AjaxSync error messages are displayed here. -->
</div>
<div style="display: none;" id="login">
    <!-- This is the login dialog, per default it is invisible
         (display none) -->
    <input type="text" id="username"/><br/>
    <input type="password" id="passwd"/><br/>
    <input type="button" onclick="app.clickLogin()"
        value="Login"/>
</div>
<div style="color: green;" id="message">
    <!-- The messages sent and received by the AjaxSync chat
         application are displayed here. -->
</div>
<div id="editor">
    <!-- The following textarea is the input field of the AjaxSync
         chat application. -->
    <textarea cols="80" rows="20" id="sendmsg"></textarea>
    <!-- A click to the send button sends a message to every
         listening AjaxSync chat client. -->
    <input type="button" onclick="app.clickSend()"
        value="Send"/>
</div>
Be aware of the two onclick handlers for the two buttons; they will be described later. Be also aware that the login dialog is hidden per default.
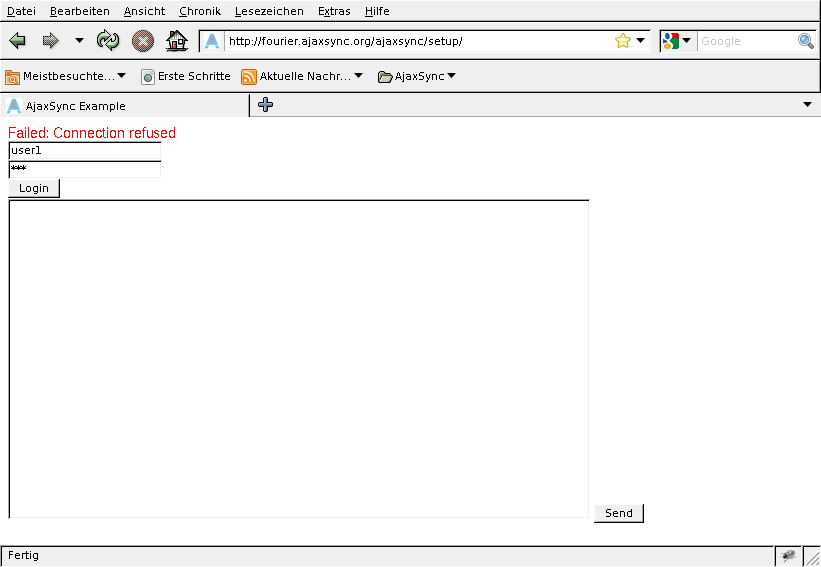
This code results in the following display:
One error message is displayed in red above the login dialog; I forced it by starting the application while the Synchronizer service was not running. No style sheets are applied to change that display (except choosing a sans serif font even in Internet explorer).
Now we will fill that elements with live. The first step is including the AjaxSync JavaScript Client library inside the head tag:
<script type="text/javascript" src="js/ajaxsync.js"></script>
This will give us an object named ajaxsync; this is the API we will use now.
Then we will create an application object:
<script type="text/javascript">
    /*
     * This is the AjaxSync example chat application object.
     * It contains:
     * - the two callback handlers for displaying error
     *   messages and showing the login dialog,
     * - a function for performing a users login bound to the
     *   login button,
     * - a function for sending a chat message bound to the
     *   send button,
     * - and the handler function which will be called be
     *   AjaxSync for displaying a received chat message.
     */
    var app = {
        ...
    };
    ...
</script>
That object contains a buffer for the username. That is unnecessary with AjaxSync, we are using it for appending this name to the chat messages, so the message is displayed prefixed with its senders username.
    var app = {
        loginName: '',
        ...
    };
Next we define the error handler. This is a function which will be registered later in the ajaxsync object. That object calls this handler every time AjaxSync encounters an error.
Because this messages could contain f.e. parts of SQL statements containing AjaxSync messages as data, we will have to add an escaping mechanism in order to display that text as text, not to be confused with HTML tags. It should be enough to replace the three characters &, < and >. Be aware that I do not want to write a professional application here, only to demonstrate the use of AjaxSync, but that demonstration should be stable enough not to shatter the entire screen with its first usage ...
var app = {
...
displayError: function(e) {
// escape HTML tags
e = e.replace("/&/","&");
e = e.replace("/</","<");
e = e.replace("/>/",">");
// show the error message in its own div element
document.getElementById("error").innerHTML
+= e+"<br/>";
},
...
};
Next step is the login mechanism. Be aware that in theory it is possible to initiate a logout on the server side. The framework would detect that with the next keepalive signal. If that happens, the login dialog should be displayed. For this reason we create another handler function which displays the login dialog. When we register that function later in the ajaxsync object, the dialog is automatically displayed whenever it is necessary, including the first call of the application.
    var app = {
        ...
        displayLogin: function() {
            // make the login dialog visible
            document.getElementById("login").style.display
                = 'block';
        },
        ...
    };
Next we have to perform the login. This handler is called by clicking on the login button (see the onclick handler in the HTML tag above). It takes username and password from the input fields defined above and then calls the appropriate AjaxSync API function with these parameters. Additionally, the username is stored in the loginName member variable described above.
    var app = {
        ...
        clickLogin: function() {
            // store the username outside the dialog
            this.loginName
                = document.getElementById("username").value;
            // hide the login dialog
            document.getElementById("login").style.display
                = 'none';
            // try to log in
            ajaxsync.login(
            document.getElementById("username").value,
            document.getElementById("passwd").value
            );
        },
        ...
    };
Next is the send message action. This handler is called by clicking on the send button (see the onclick handler in the HTML tag above). It takes the message and the stored username (loginName) and sends them to the AjaxSync server.
    var app = {
        ...
        clickSend: function() {
            // send message to remote receivers, starting with
            // the username
            ajaxsync.send(
            "chat",
            this.loginName + ': '
                + document.getElementById("sendmsg").value,
            60,
            10
            );
        ...
    };
The message sent is therefore:
            this.loginName + ': '
                + document.getElementById("sendmsg").value,
The function called is named "chat". Every application which has a listener (handler function) registered for that function will receive that message.
The two integer values are the client and the server timeout. If a network connection is broken between the AjaxSync server and one of its clients, there will be reconnection attempts every second till the connection is re-established. If a message is sent during such a network outage it will be buffered and sent as soon as the connection is re-established.
The first parameter (60) means that if the connection from our application to the AjaxSync server is broken, the application will try to deliver the message for 60 seconds before giving up and simply drop the message. Be aware that you will not be notified for such a dropping, but you can set the timeout as high as you want, limited only by the maximum UNIX timestamp of 19.01.2038.
The second parameter (10) means that if the connection from the AjaxSync server to one of the message receivers is broken, the server tries to deliver the message to that receiver for 10 seconds before giving up and simply drop the message. Here you can see why you aren't notified for a failure/dropping. It is because AjaxSync messages are broadcasts in theory sent to hundreds of receivers, and only the server is aware who is a receiver and who is not - the sender of the message does not know that.
As before, you can set the timeout as high as you want limited only by the maximum UNIX timestamp of 19.01.2038.
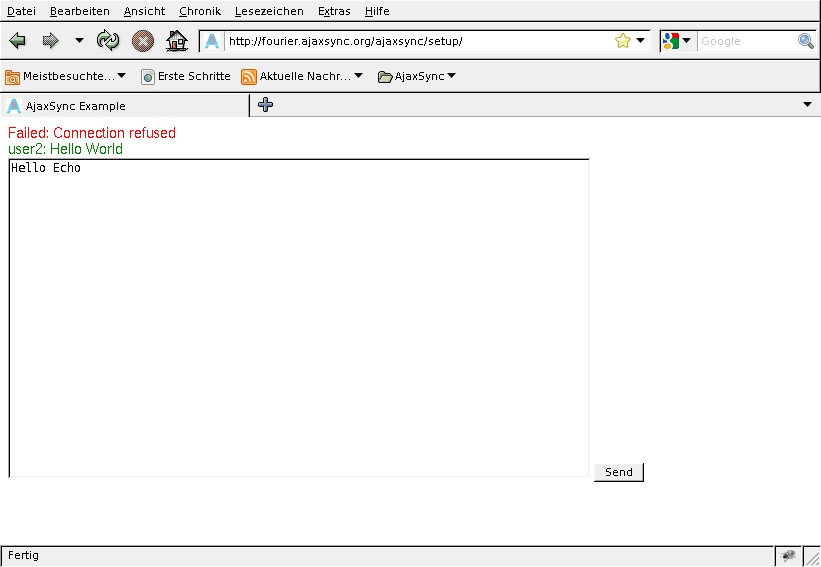
Because AjaxSync will not send a message back to its sender, we will have to display it ourselves:
    var app = {
        ...
        clickSend: function() {
            ...
            // display message in out own window, but in a
            // different color
            document.getElementById("message").innerHTML
                += '<span style="color: black;">'
                + this.loginName
                + ': '
                + document.getElementById("sendmsg").value
                + '</span><br/>';
            // delete message from the input text area
            document.getElementById("sendmsg").value = "";
        },
        ...
    };
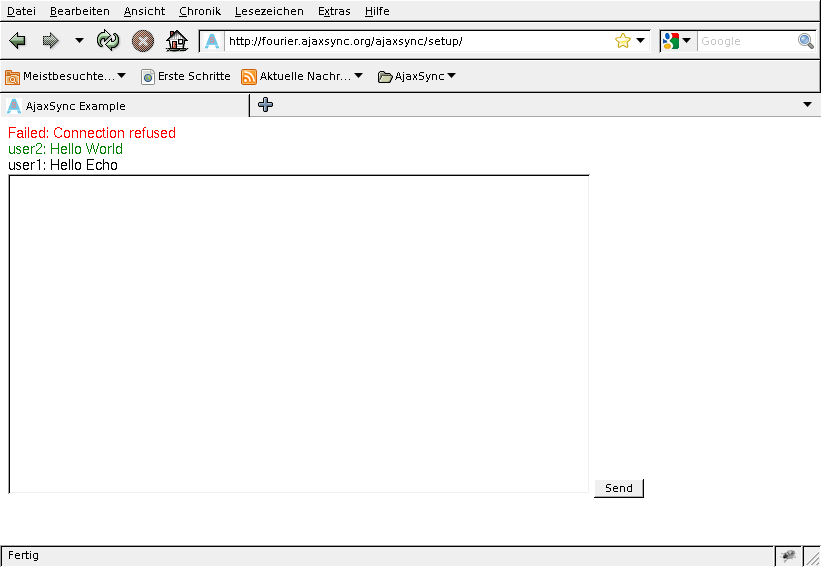
At last we have to display received messages. For that we create a handler function which is (after registration) called by the AjaxSync framework automatically whenever a message is received - or exactly said, whenever this function is called from another AjaxSync client. Be aware that we have only one function in this chat client (as said before, named "chat"), but in a more complex application there could be many different functions.
As with the error handler, this method should escape any HTML tags to display them uninterpreted.
var app = {
...
chat: function(msg){
// escape HTML tags
msg = msg.replace("/&/","&");
msg = msg.replace("/</","<");
msg = msg.replace("/>/",">");
// show received message in its own div element
document.getElementById("message").innerHTML
+= msg+"<br/>";
}
};
Now only one thing is missing to make the whole application running. We have to register the handler function "chat" (in a more complex application we would have to register each handler function, one after another), and then we have to register the error and login display handlers. With the second call, the event loop of AjaxSync is started; from that moment, you have a persistent connection to the AjaxSync server.
<script type="text/javascript">
    /*
     * This is the AjaxSync example chat application object.
     * It contains:
     * - the two callback handlers for displaying error
     *   messages and showing the login dialog,
     * - a function for performing a users login bound to the
     *   login button,
     * - a function for sending a chat message bound to the
     *   send button,
     * - and the handler function which will be called be
     *   AjaxSync for displaying a received chat message.
     */
    var app = {
        ...
    };
    /*
     * To start the application there are only two further
     * things to do: first the handler function for receiving
     * messages has to be registered, and second the AjaxSync
     * framework has to be initialised using the two other
     * callbacks (error messages and display login dialog).
     */
    ajaxsync.registry.addHandler("chat",app.chat);
    ajaxsync.init(app.displayError, app.displayLogin);
</script>
That is everything you need to start chatting.
 
The chat application described here is part of your default AjaxSync installation described in Setup. You can try it by calling the root page of your AjaxSync server, provided that you have users created in your AjaxSync Administrators interface which can call and receive calls from a registered function "chat" as described in Admin Interface.
However, its whole strength AjaxSync will show only if you connect your webinterface with services on other computers. For this, you have to use the C++ Connector or a wrapper to it.
|